How To Remodel Your Kitchen: Everything You Need for a DIY Renovation
By: Andrew Saladino |  10 min
If you're still tripping over that peeling linoleum flooring, struggling to make room for all those new baby bottles, or simply sick of entertaining guests in an awkward, cramped space, a kitchen home improvement project may be in your future.
Interested in learning how to remodel a kitchen yourself? We've put together a step-by-step guide to help take your kitchen from outdated and drab to stylish and functional.
1. Plan Your Kitchen Remodel
Creating a thorough remodeling plan is arguably the most important step in your kitchen renovation. The more detailed your vision is, the easier the project will come to life. Your remodeling plan should include:
- Your scope for the project, such as basic updates or total demolition
- Your kitchen must-haves to factor into your budget
- Your color scheme to help create a cohesive design
- Your budget for each stage of the renovation, including waste removal, labor, materials, and unexpected costs
- An updated kitchen layout with accurate measurements
- Materials needed to complete projects you're planning on doing yourself
- A schedule detailing when to order materials, lead times and shipping, how long each stage of the renovation should take, etc.
A good remodeling plan will require extensive research. Sometimes it can take around two to three months to envision what you want or need in a kitchen. Start developing your vision by taking inspiration from online blogs, magazines, and photo galleries. Creating a kitchen mood board is a great way to put your vision on paper.
Pro Tip: If you don't have much experience remodeling, consider hiring a team of professionals that can take care of everything for you. This will ease some stress on your shoulders and minimize the risk of things going wrong. Remember to apply for any permits you may need - like building and mechanical - before anyone begins to work. Failure to do so may result in issues with the neighborhood and city.
2. Start Demolition
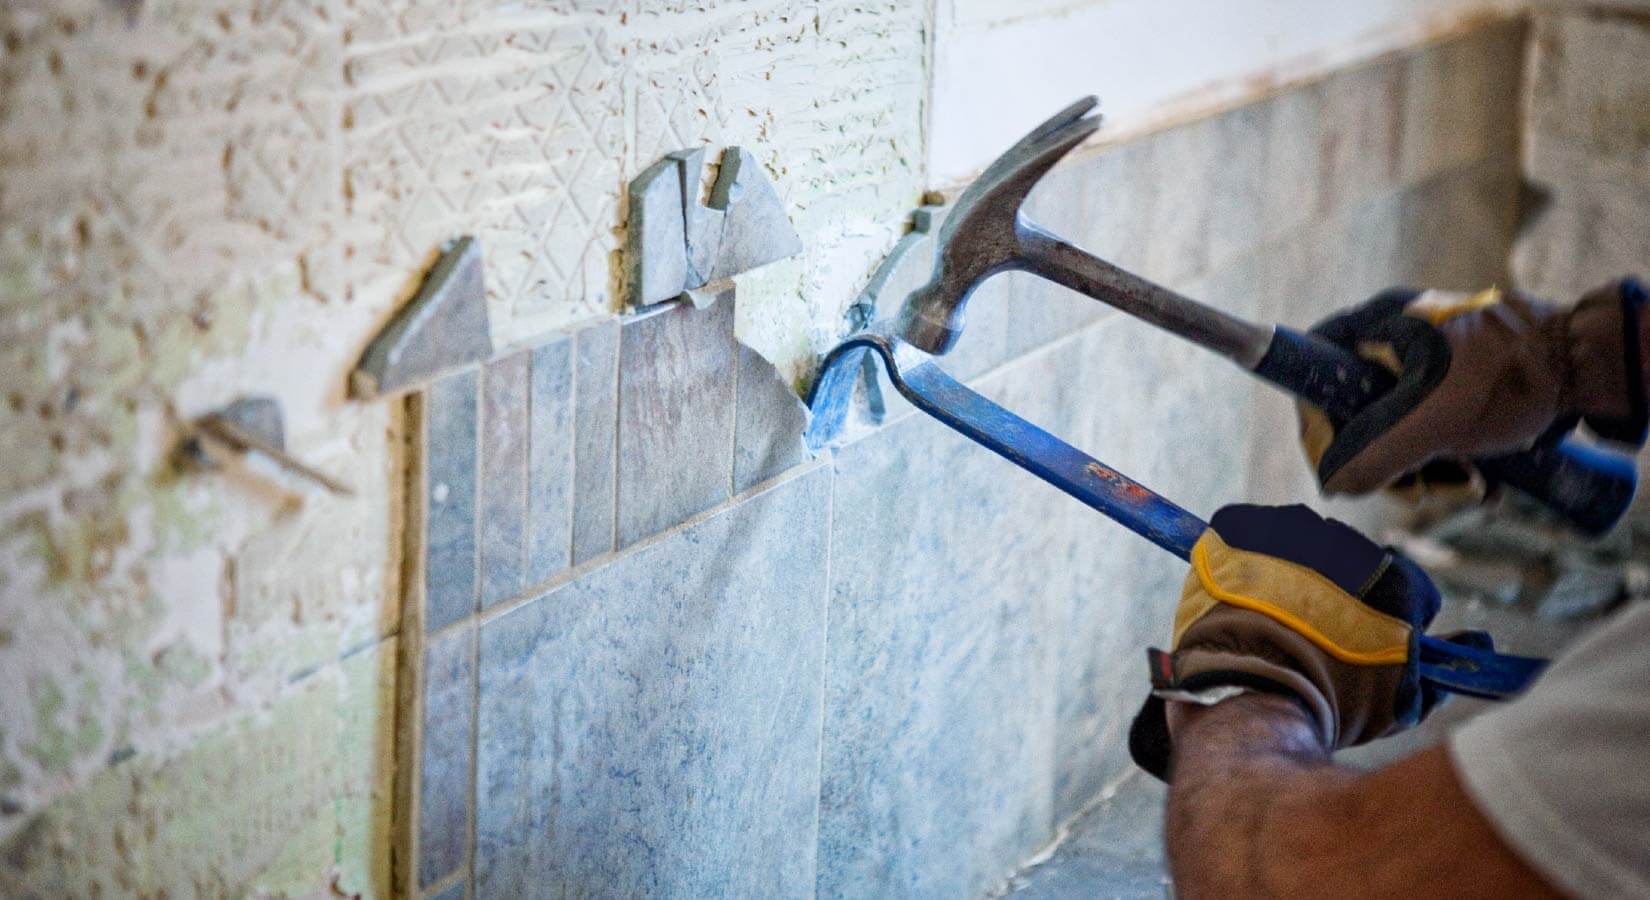
Looking forward to busting up your old cabinets and tearing out that outdated linoleum flooring? The demolition stage focuses on removing everything from your kitchen so you can start with a blank slate.
Before you go heavy with the hammer, consider donating your old kitchen cabinets and appliances if they're still in good shape. Donating the existing parts of your kitchen can be a better option if you're looking to get rid of everything fast and it may save you money on waste removal. However, if you choose to resell, you can put that money toward your funds for remodeling.
Pro Tip: If you're considering hiring a contractor anywhere in the process, demolition is a good stage to do so. If you attempt this step on your own, it's possible to make a mistake and create future problems with the foundation.
If you choose not to hire a contractor, make sure you turn off the water in the house before starting the demolition. Failure to do so may cause pipes to explode or create an unwarranted leak.
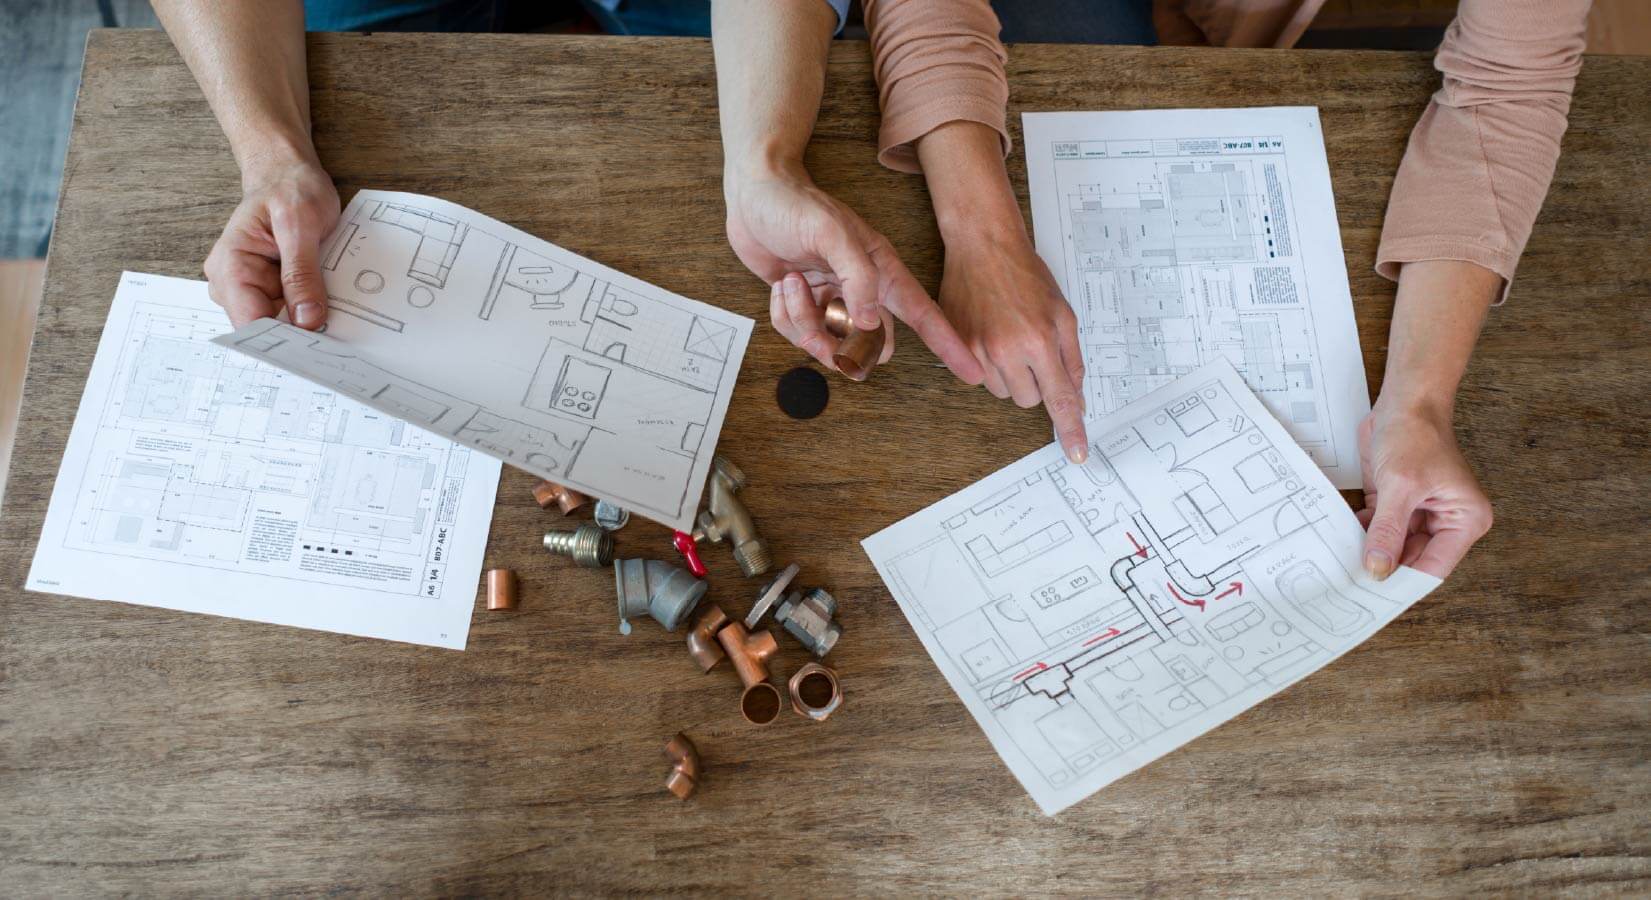
3. Complete Rough-In Work
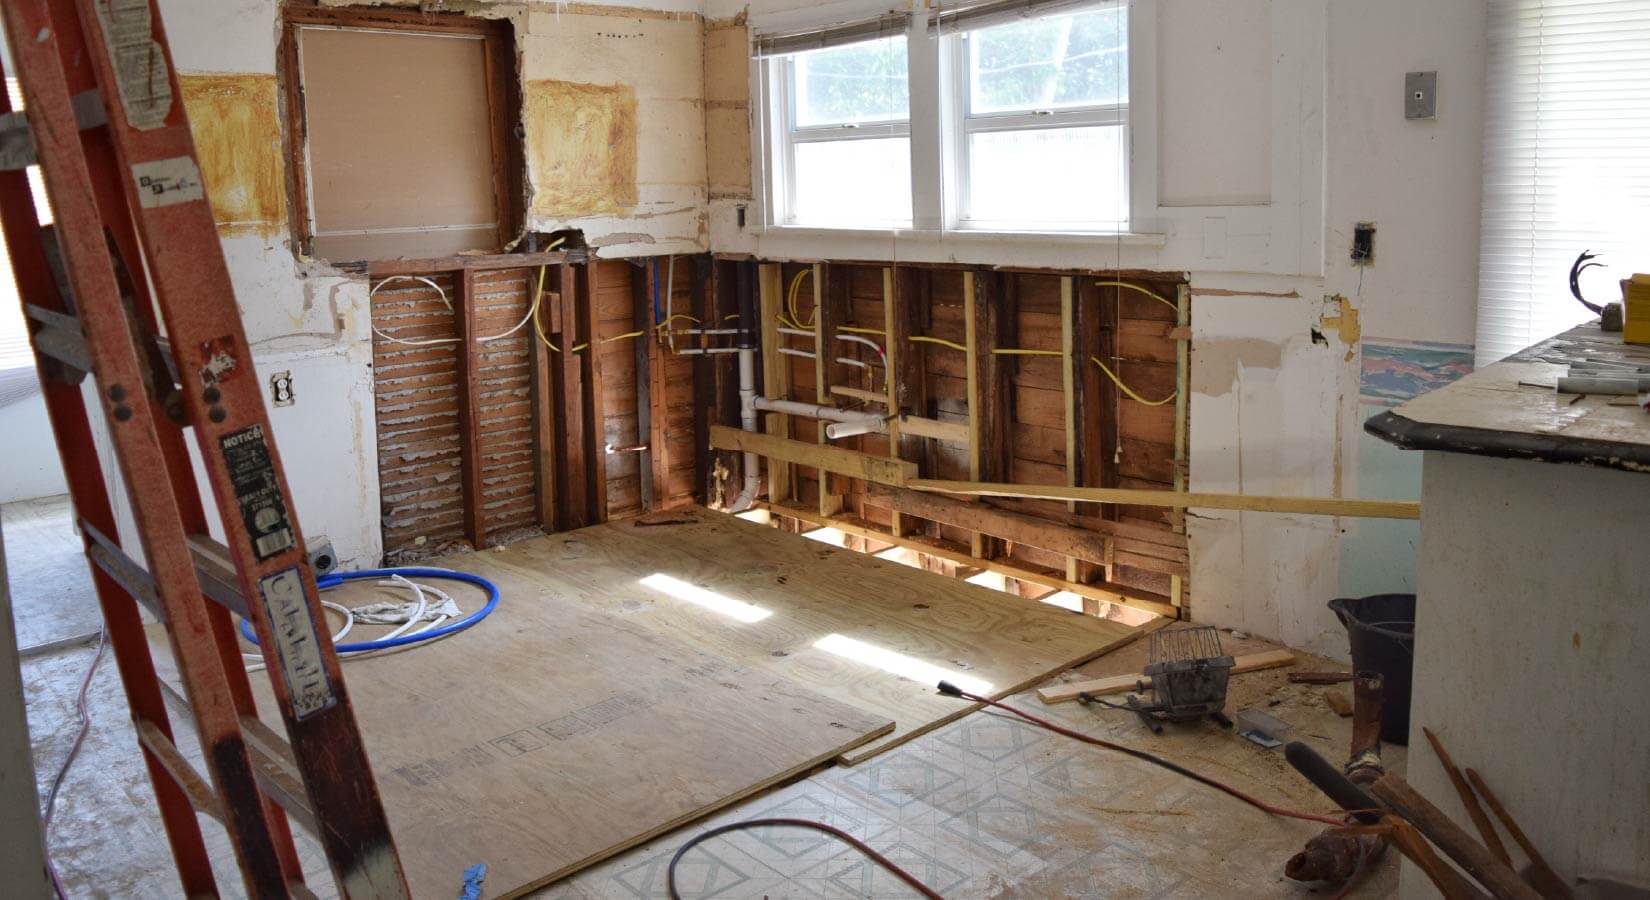
Once your kitchen has been completely cleared out, you'll be able to focus on updating any framing, plumbing, or electrical work your new design may require. If you're changing the layout of your kitchen, this step will be much more complicated than simply moving a light switch over a few inches.
Depending on the scope of your renovation, this step may take around three to five days or even weeks to complete. Plan to hire a home inspector before and after this stage to ensure the work you've done is up to code.
Pro Tip: Unless you have extensive experience installing plumbing and electricity, hire a professional for this step. Even standard household electrical voltage can be deadly, and a plumbing error can have disastrous consequences for your remodel.
4. Hang and Paint Your Drywall
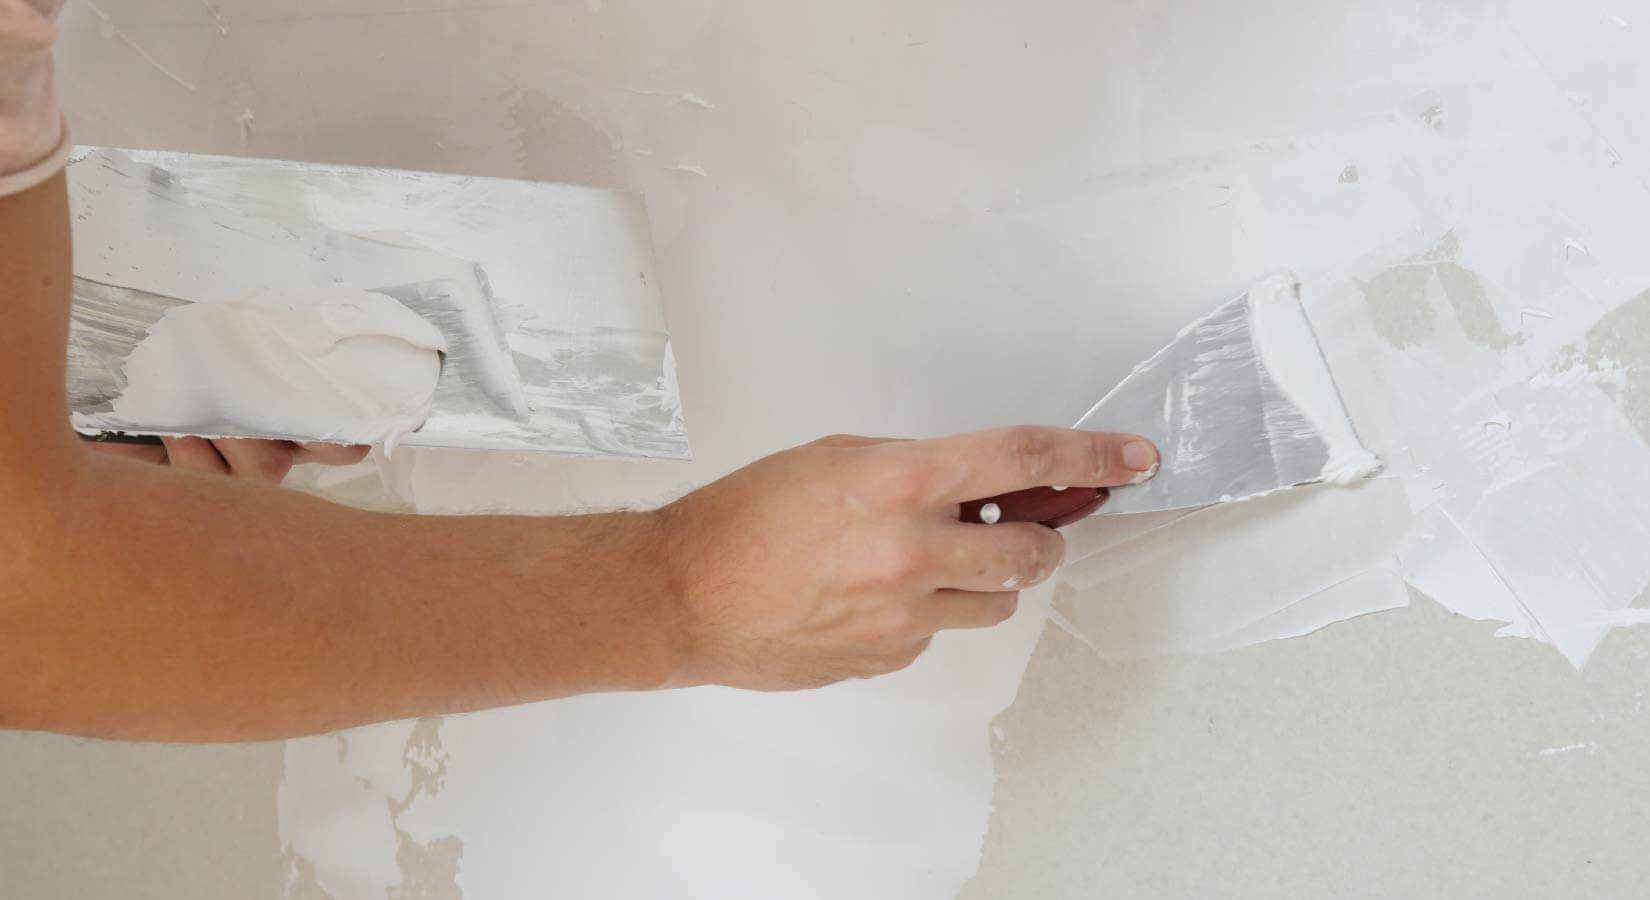
If your rough-in work passed inspection, you can begin to hang your drywall. This is where the design aspect of your kitchen remodel comes into play. Finalizing drywall can take up to two weeks. Unlike the previous steps, drywall is easy enough to learn how to install on your own, so you're able to save money by not hiring a contractor. Just make sure your measurements are precise, and don't forget to wear a dust mask!
Once you've installed the drywall, you're finally ready to add your first design element to your kitchen: paint. The color you choose for your kitchen can influence the entire atmosphere of the space.
Traditionally speaking, people tend to favor neutral colors when painting their walls. Neutral colors help maintain a cohesive look, even if you change other things such as cabinets and appliances later on. However, fun, unexpected colors and accent walls are an easy way to give your kitchen a personal touch.
Pro Tip: If you are one to switch things up often, consider using wallpaper instead of paint. Replacing wallpaper is much easier than repainting your kitchen.
5. Lay Down Your New Flooring
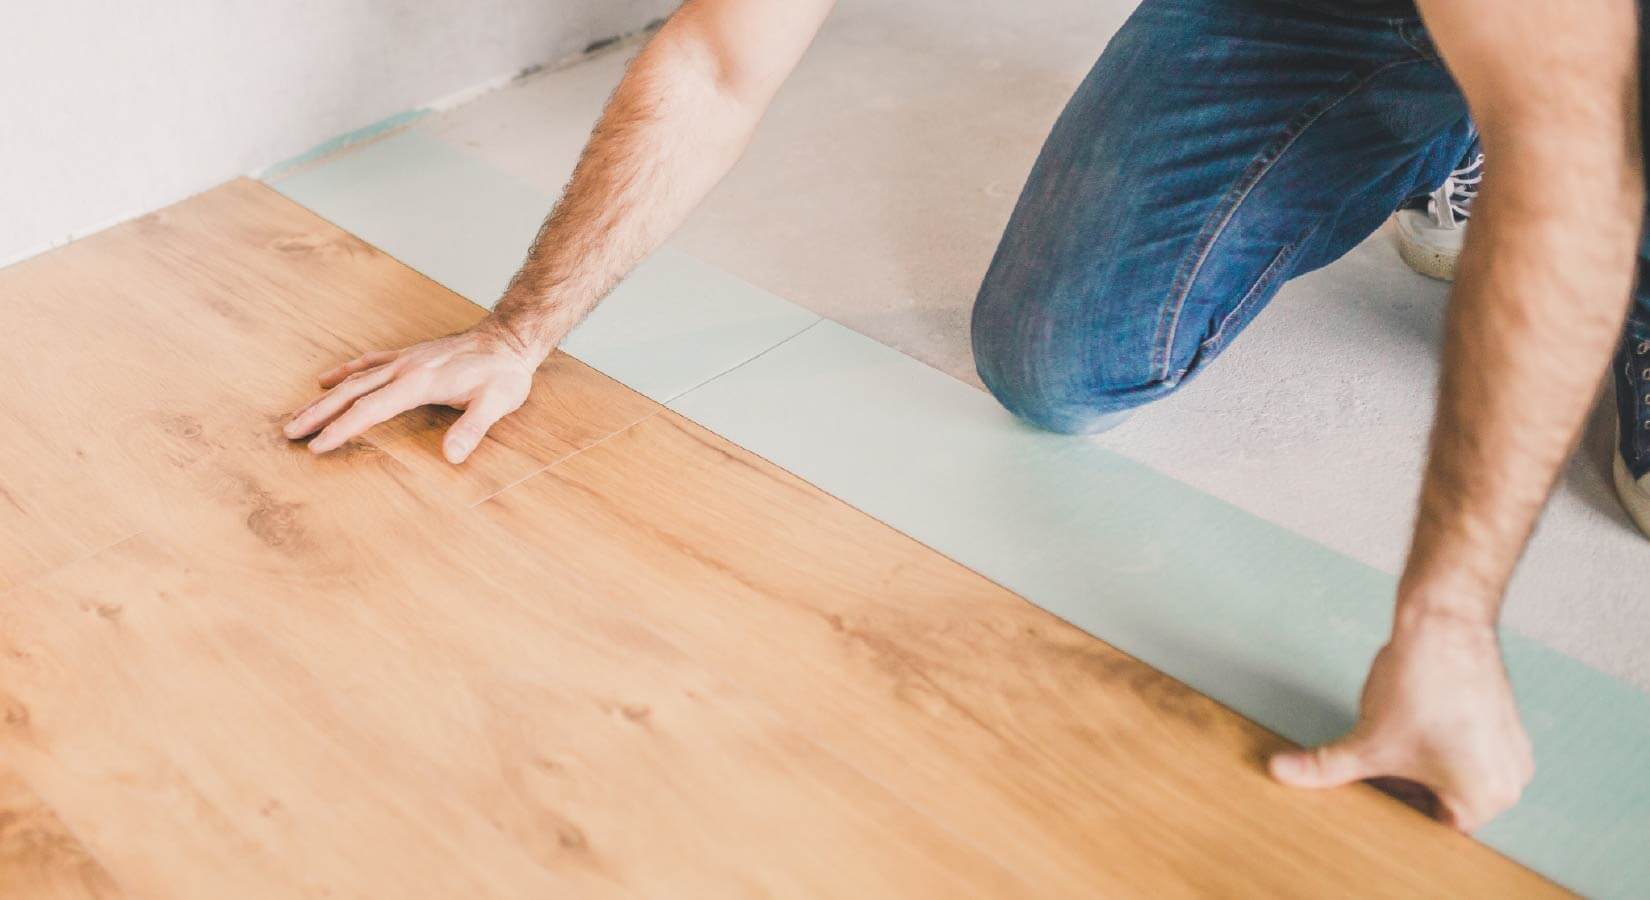
Next, it's time to install the new flooring in your kitchen. With new materials, styles, and colors to choose from, there are plenty of options that are both stylish and functional. Pick a style of flooring that is best suited to you and your family's needs. For example, ceramic flooring is a great option for easy cleanup if you have young kids or pets.
Depending on the type of flooring and the size of your kitchen, the step can take anywhere from one to three days to complete.
Pro Tip: Some people prefer to wait until the end of the process to install flooring because they may feel worried the next steps in construction will scratch the surface. However, the downside to installing flooring last is that it won't continue under your cabinets and appliances. Flooring that extends under these items can add to the resale value of your home.
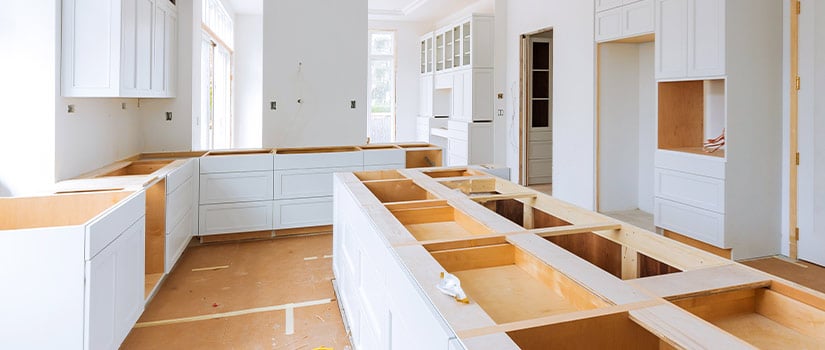
6. Install Your Kitchen Cabinets
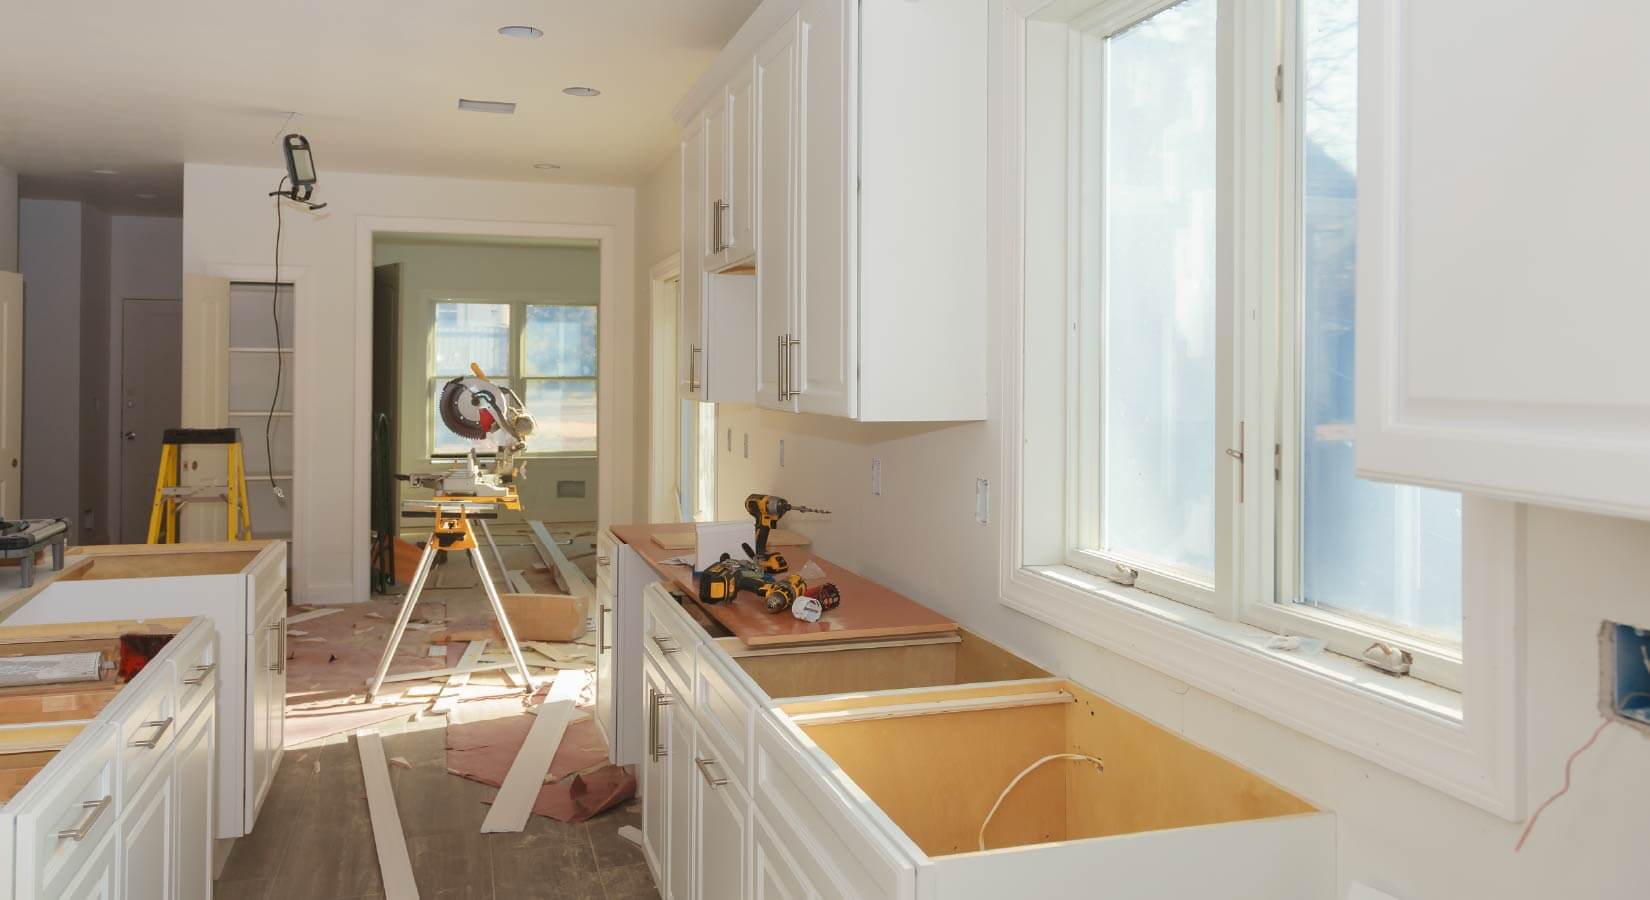
Once the floors are in, you can begin to install your kitchen cabinets. Cabinets not only play a huge role in the design of your kitchen but also your storage and organization needs as well. To choose which cabinets will work best for your space, consider your cooking habits, kitchen layout, and current storage constraints. No matter how awkward or small your kitchen may be, there's a unique cabinet solution to help you maximize your space.
Your kitchen cabinets are the most important elements of your kitchen, both for design and functionality. For most kitchen remodels, kitchen cabinets make up the majority of the budget. When ordering kitchen cabinets, it's important to invest in high-quality products that will serve you for decades to come.
Pro Tip: Get high-end cabinets for less with ready-to-assemble (RTA) cabinets. These cabinets not only look amazing, but they're also easy enough to install on your own and only take around 15 minutes each.
7. Secure Your Countertops

With cabinet installation complete, you can begin installing your countertops. There are many different countertop options to choose from, from sleek quartz to industrial concrete. Depending on the style and material you pick, fabrication and installation can take anywhere from two to four weeks to complete.
Consider style, durability, and cleaning needs when choosing a new countertop - that butcher block island might look like a good idea, but the upkeep may make you think twice. Also, keep in mind that countertops are very difficult to install. You may need to spend some extra funds to hire a professional for installation.
Pro Tip: Spending less on countertops is a great way to save money. Many cheaper countertops, like marble laminate or quartz, look similar to expensive ones and won't break the bank.
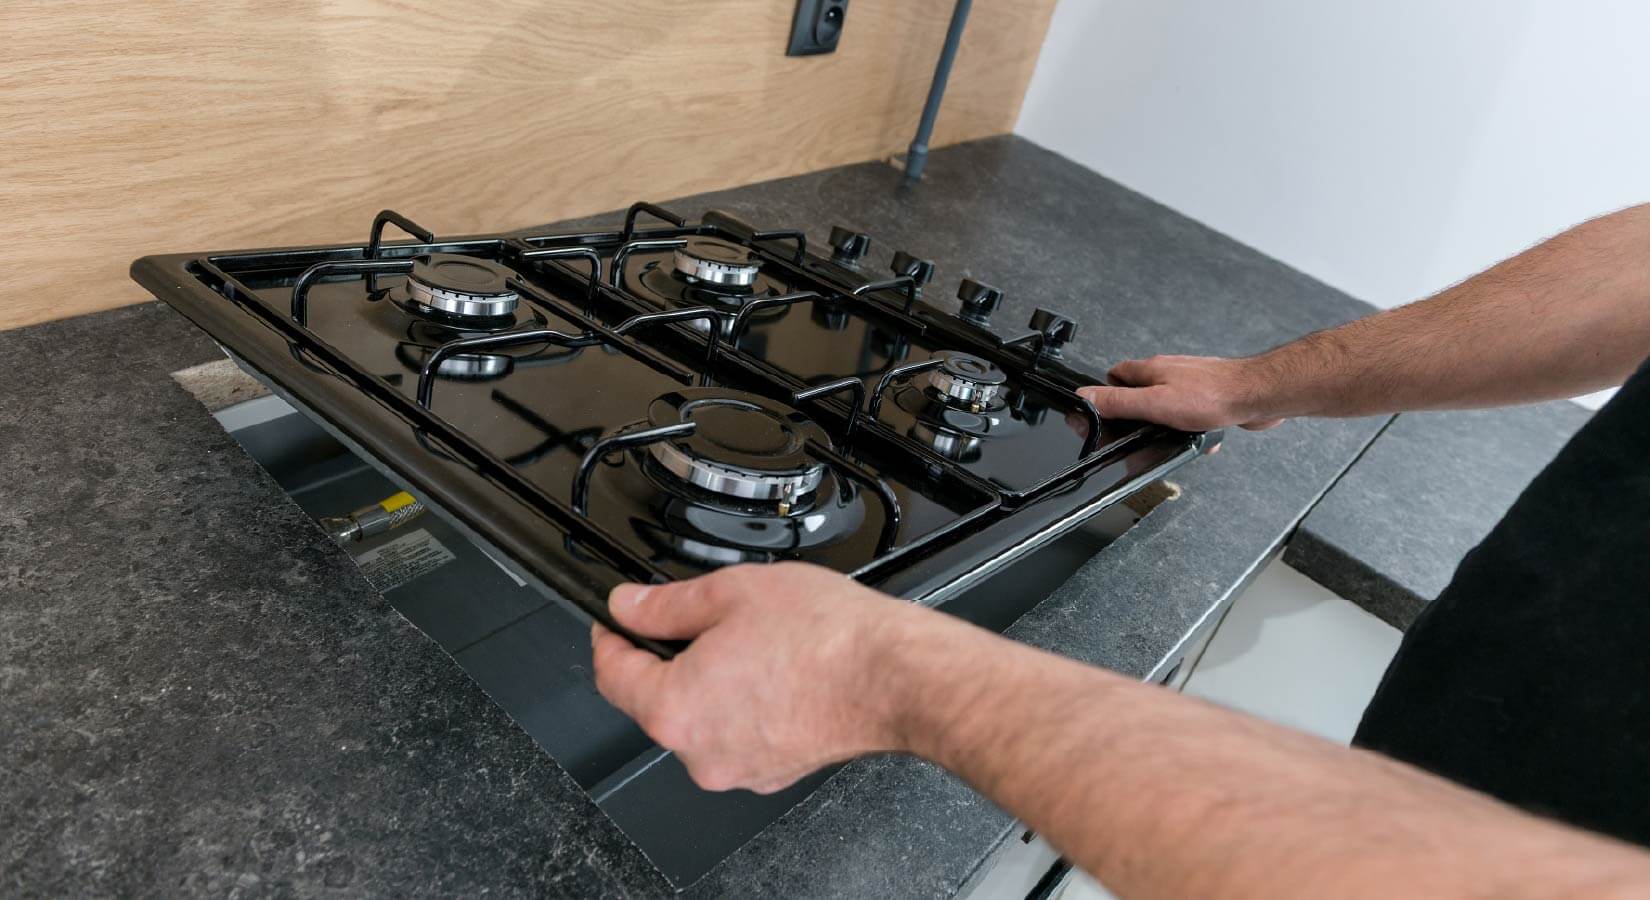
8. Put in Plumbing Fixtures

Next, it's time to install your sink, faucet, and other plumbing fixtures. You have many styles to choose from when deciding what type of kitchen sink to install, but be sure to consider your space requirements and cleaning needs before ordering. While this stage may not seem very fun, a stylish and functional sink can play a big role in the overall aesthetic of your design.
This can take about one to five days to complete, depending on the type of sink you choose. For some styles, such as undermount sinks or integrated sinks, professional installation may be required.
Pro Tip: If you find yourself in the kitchen more often than not, consider implementing a kitchen island sink. This will give you more space to cook and an efficient kitchen flow.
9. Hook Up Your Appliances
With most renovations done, it's finally time to bring in your appliances. This step will also take about one to five days. You may want to hire an electrician to help you rewire and install new appliances - one wrong move may leave you with appliances that don't work or will break down shortly.
Pro Tip: Bringing in appliances can sometimes scratch new flooring. If you are worried about this, place a plastic covering or tarp over the floor for an added layer of protection.
10. Finish Details and Hardware
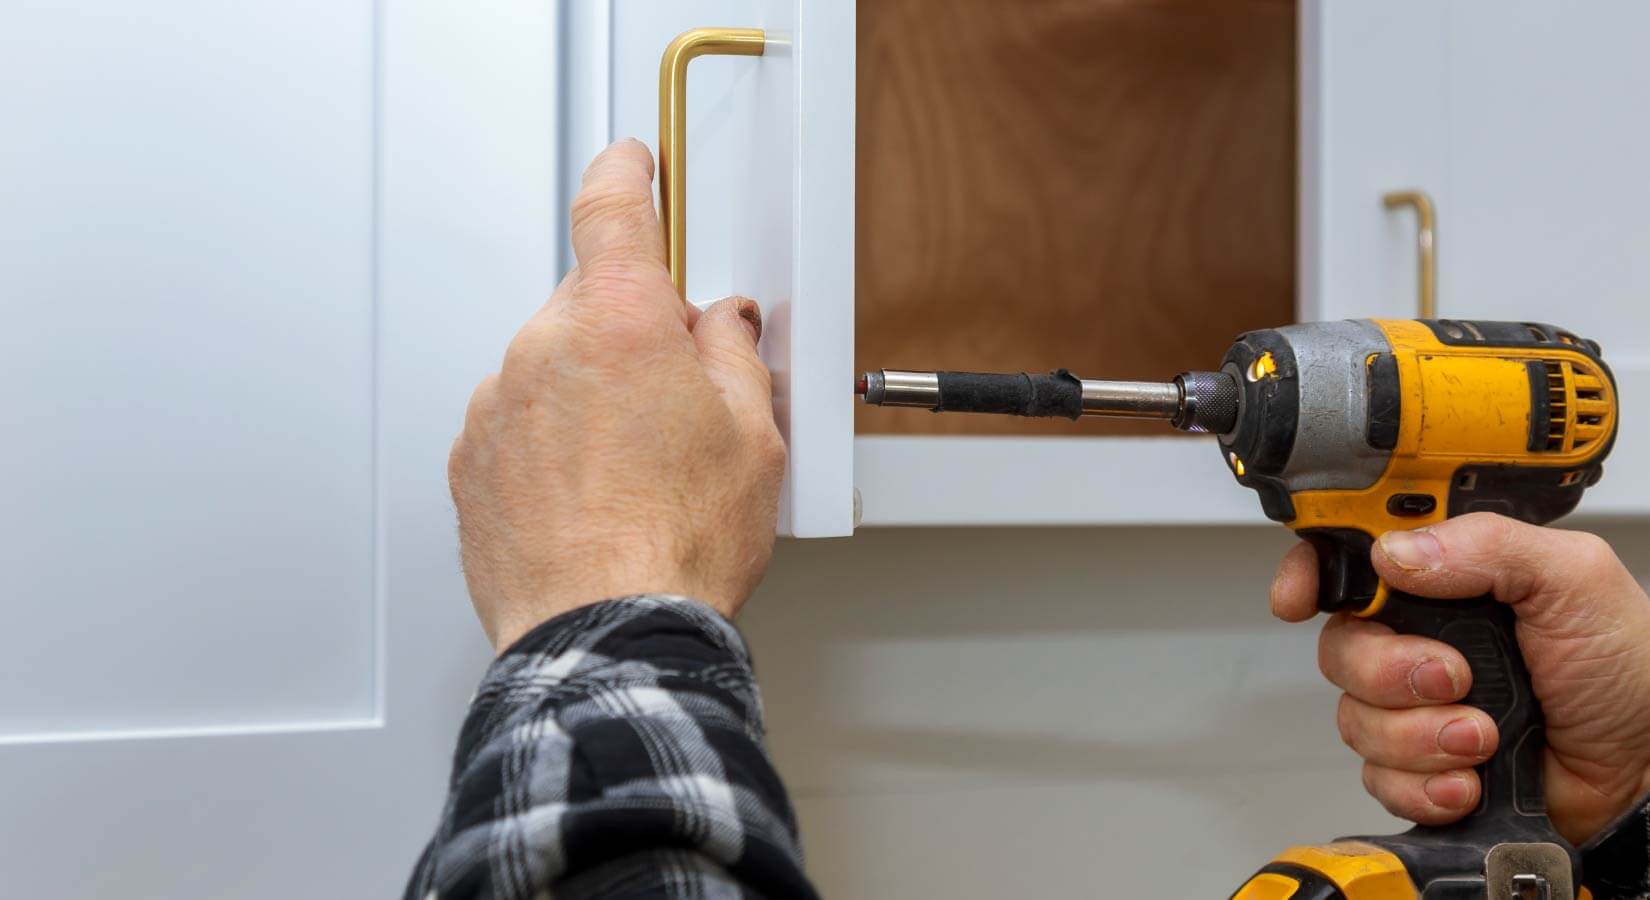
As the remodeling process comes to a close, you'll need to finish up last-minute details and install any remaining hardware, such as cabinet handles and pulls and light fixtures. Allocate one to two weeks for this last step.
For last-minute touch-ups, check to see if any paint may have chipped on the walls while remodeling. You may also want to add crown molding, the decorative lining placed along where a wall meets the ceiling. This is not necessary, but it can help elevate the look of your kitchen.
Pro Tip: Install crown molding if you want a higher return on investment down the line.
11. Install Your Backsplash
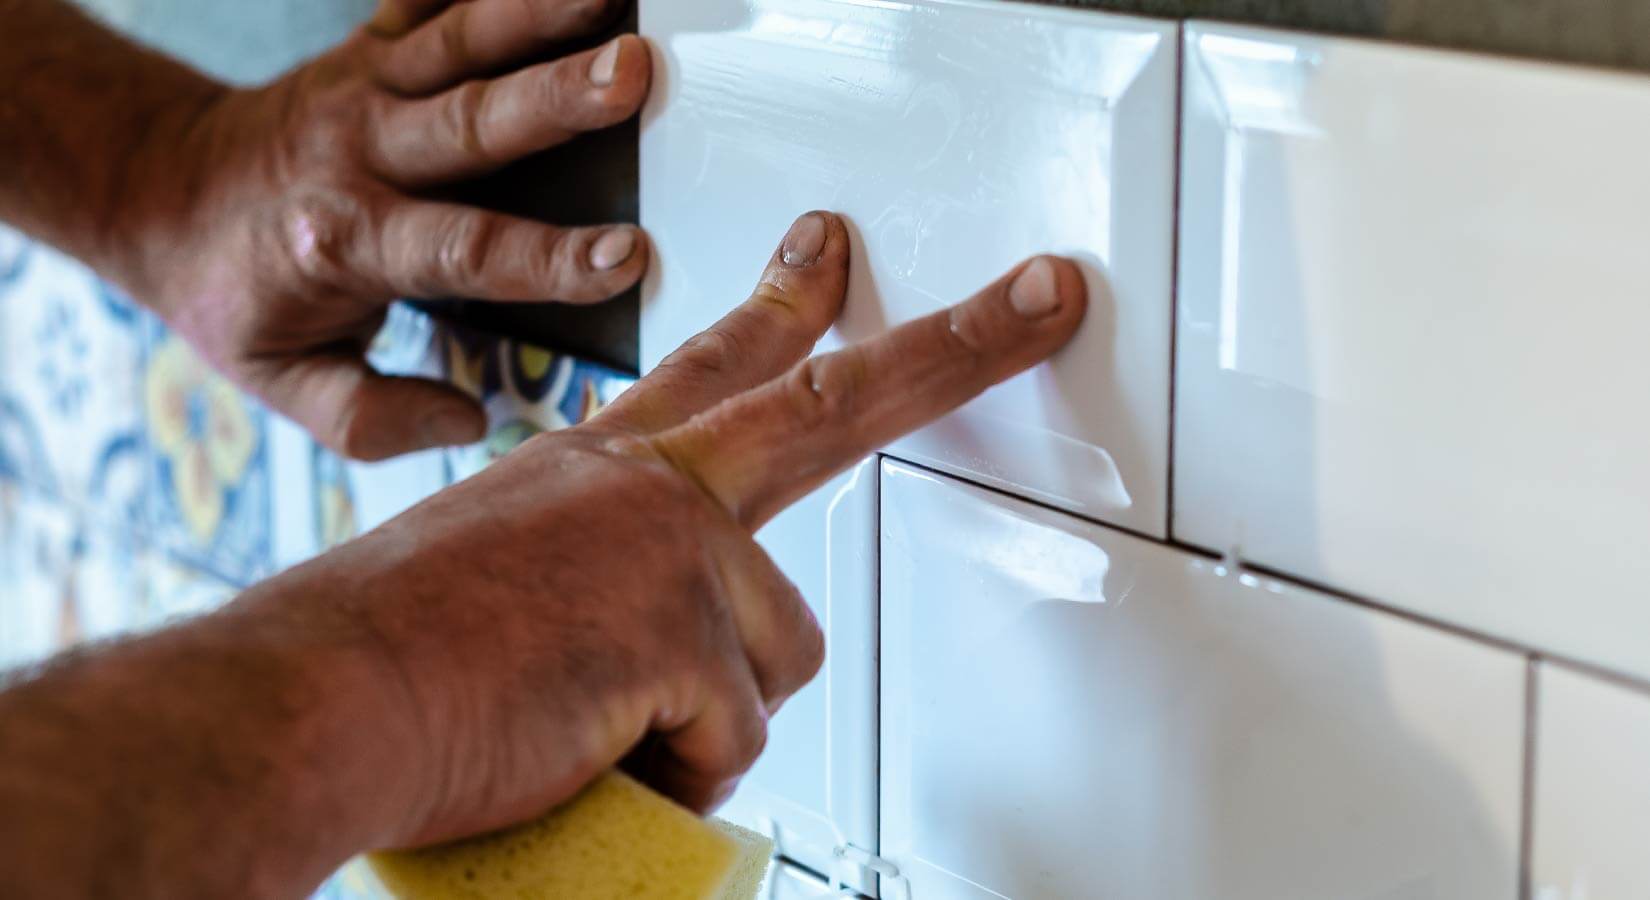
Installing your backsplash is the very last step in the kitchen remodel process. It can take roughly two to three days to complete. The style you choose comes down to personal preference. You may want a more classic look like polished subway tiles or marble. Or, if you're interested in playing around with different backsplash styles, you can choose mosaic tiles, concrete slabs, or stained glass for a totally unique look.
Pro Tip: Once the backsplash is in place, don't forget to schedule your final inspection to start enjoying your dream kitchen!
What To Consider Before a DIY Kitchen Remodel
Completing a full kitchen renovation yourself is no easy feat. Before you start busting up your old cabinets or tearing out last century's fluorescent lights, it's important to keep the following considerations in mind.
Safety
Even experienced contractors don't skimp on safety. To minimize the risk of cuts, bruises, or burns, make sure you're equipped with the necessary protective gear, such as:
- Hard hat
- Gloves
- Goggles
- Ear protection
- Dust mask
- Respirator mask (if you're dealing with chemicals)
- Knee pads
Your clothes should also be form-fitting and made of durable material that'll protect you from cuts and other injuries. Also, make sure all your jewelry is off and stored in a safe place — you wouldn't want your wedding ring getting caught on a rouge nail (ouch).
Experience
If you've never picked up a hammer before, you should really think about how much of the renovation you should do yourself. While you can approach it as a learning process, most kitchen remodels are expensive and should be done with durability and longevity in mind. If you're not 100% comfortable with something, don't leave it to chance — there's no shame in hiring a professional for help!
Materials Required
Don't underestimate the number of tools and materials you'll need to do a quality job on your kitchen remodel. From tile saws and snap tools to grip clamps and drill bits, expect to make numerous trips to the hardware store before completing your project.
It's important to note that tools can be expensive. While they're handy to have, you may not find much need for a $200 miter saw beyond your kitchen renovation. If you do plan to take the DIY path, you may be able to rent some of the more expensive tools from your local hardware store.
Codes and Regulations
To ensure your kitchen is safe and livable, you'll need to check that your work meets the necessary local building codes and requirements. That means hiring an inspector before and after your renovation to audit all your electrical, plumbing, ventilation, and layout updates.
The codes can be extensive, and failure to follow one may result in costly and unexpected changes before you can enjoy your new kitchen. Carefully research local building codes and consult with an inspector before planning your renovation.
Budget
On average, it can cost roughly $10,000 to $40,000 to remodel a kitchen completely on your own, depending on the size and scope of the project. If you choose to hire a team of professionals at any point in time, the cost will increase. The standard recommendation is to spend no less than 5% and no more than 15% of your home's total value on your kitchen remodel.
When laying out your DIY kitchen renovation budget, don't forget to take into account additional costs and one-off fees. This could include things like:
- Mold damage repair
- Structural repairs
- Cost of Inspection
- Dumpster rental
- Disposal fees
- Tool rentals
- Unexpected repairs
It's also wise to have a small sum set aside for when things don't go as planned. Professional contractors typically designate about 10% of their budget for unexpected costs and repairs.
Ready to get started on your kitchen remodel? Our NKBA-certified designers can help you create the perfect kitchen layout and design free of charge.
How to Remodel Your Kitchen FAQs
Still on the fence about whether to hire a contractor or do your renovation yourself? We've answered a couple of the most frequently asked kitchen remodeling questions to help you decide.
How much should I spend on a kitchen remodel?
On average, it can cost roughly $5,000 to $12,000 to remodel a kitchen completely on your own, depending on the size and scope of the project. If you choose to hire a team of professionals at any point in time, the cost will increase. The standard recommendation is to spend no less than 5% and no more than 15% of your home's total value on your kitchen remodel.
How do I create a budget for a kitchen remodel?
The planning stage is key in creating and adhering to your budget. Prioritize what you want to be done first. Try to avoid the extra add-ons for style, and focus more on practicality. This kitchen remodel cost estimator can help give you a clearer picture of your budget.
You can also save money by performing some of the steps on your own. For example, you can purchase RTA cabinets to assemble and install yourself or hang your own drywall.
What costs the most in a kitchen remodel?
The most expensive part of a kitchen remodel is the kitchen cabinets — 29% of an individual's initial funds are usually spent on purchasing and installing kitchen cabinets. This is because you'll need cabinets that provide both practical and aesthetic value. You'll want to invest in something durable that'll last you a while, but will also contribute to the overall look of the kitchen.
When remodeling, remember that the planning stage is very important. This is what sets the tone for the rest of the process. You can save money by completing some of the steps on your own, but if you're feeling even an ounce of doubt, you should let a professional handle it. If you find yourself under a strict budget, consider items such as RTA cabinets that are more time- and cost-efficient to install.