bathroom tips
Bathroom Demolition! (And Nine Tips To Do It)
by Sarah Lu
June 17, 2013
 So you’ve found your brand new bathroom cabinets. You’ve decided on the beautiful mosaic tile for your shower. And, you’re itching to order that new freestanding bathtub! But before you can install all that…
Demolition is the first step to achieving your fantasy bathroom. Unfortunately, demolition itself is as real as it gets. The process is often long, arduous, and takes a lot of patience. The upside is, that you will probably experience an extremely satisfying delight in removing that hideous pink tile or ripping out those old dirty cabinets you’ve hated for so long.
Before embarking on your dream bathroom remodel, check out these nine helpful tips for making the demo journey as easy as possible:
1. Design a plan for the final layout. Do not begin demolition without a clear idea of what you want your dream bathroom to look like, final measurements, and exact products you will be purchasing to fill the space. Are you tearing down a wall? Make sure you have a blueprint drawn out so everyone is on the same page.
2. Assemble a team. Do you have siblings or awesome friends who’d volunteer a Saturday helping you out to get one step closer to your dream bathroom? Don’t forget to offer beers or dinner afterwards and definitely order lunch for the group! This most likely won’t be finished in a day, so wisely schedule your friends so you have someone coming to help out every weekend.
3. Discover what’s behind that wall. Generally, it’s safe to assume that there’s some type of electrical wiring back there. There could also be water pipes, or even You can knock out a small hole and use a flashlight to scope out what you’re working with.
4. Have a “Trash Plan of Action.” Will you be renting a rollaway dumpster? These are cost-effective if you have a lot to demolish and will save you time and money instead of driving to a landfill. You could also do research on a hauling service and see how much it will cost for you to hire someone to pick up items like plaster and lathe from you home to dispose of.
5. Turn off water supply and power. This will prevent leaks and electrical injuries.
6. Remove objects like shelves, mirrors, light fixtures, and cabinets first. Simply unscrew and make sure you don’t leave sharp screws or nails lying around on the floor – it’s hard but try to keep your demolition area as hazard free as possible! For extra protection, wear industrial boots. Do not wear thin sneakers and never open toed shoes.
7. Equip yourself! Tools every DIY demolisher will at least need are: a sledge hammer, crowbar, a prybar, a clawhammer, and get a pack of disposable dust masks. You never know what might be poisonous, especially as lots of old homes have asbestos.
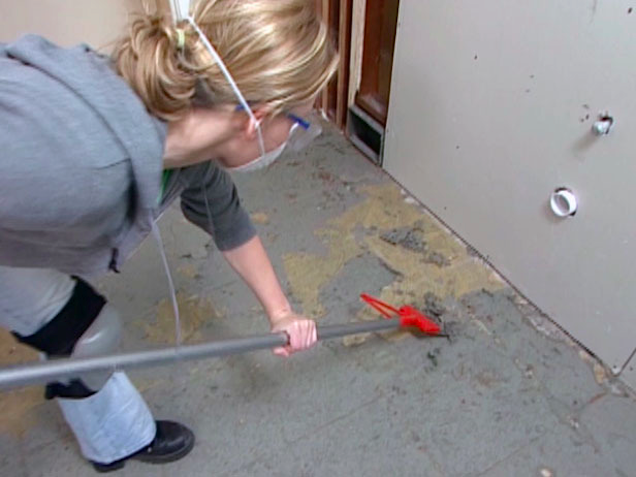
8. Be prepared for the flooring. If you’re installing a gorgeous new tile, keep in mind that ripping out the flooring is often the most labor intensive part. There will be A LOT of debris, plaster, and dust that accumulates. If you were to hire a professional for to help out, it would be for this part, hauling away debris, and navigating anything electrical or water supply related.
9. Anticipate changes. Even though you’ve begun your project with a plan, be prepared that some things may change. A part that you thought might have been salvageable might not be, or who knows, you might discover some attractive red brick underneath all that mortar in your wall! Go with the flow, and leave some breathing room in your budget for surprises.
Have you gone through a successful bathroom demolition yourself? I’d love to hear your tips and experiences!
(Photo via DIY Network)
Sarah Lu
Six years of residing in cramped Manhattan apartments compelled Sarah Lu to constantly seek inspiration from the creative living spaces of her friends to design bloggers. As a student, she had to be resourceful, while striving to convey her unique aesthetic. Some of her proudest decor moments include repurposing a nightstand rescued from the sidewalk, leading an office revamping project, and displaying avant-garde sculptures from a local street artist and friend.
Today Sarah lives and works in Washington, D.C. as Director of Development at a girls empowerment non-profit. In her role, she works on issues affecting young women and girls and creatively and effectively increasing awareness of human trafficking in the United States. She reads popular fashion and design blogs, is an Instagram addict, and practices Krav Maga in her spare time. Sarah is also an avid traveler and loves to try new cuisines. Her parents' kitchen, where handmade Chinese dumplings and savory noodle soups are always on the stove, is her favorite room in the world. Naturally, Sarah is thrilled to have a forum to share her passion for design and a purposeful lifestyle and connect to others. Sarah earned her Master's of Social Work from Columbia University and a Bachelor's of Social Work from New York University.
![See your dream kitchen in 3D [GET YOUR FREE DESIGN]](https://cdn.kitchencabinetkings.com/blog/wp-content/uploads/see-your-dream-kitchen-in-3d.webp)
![Contractor Discount Program: Offering contractors and builders special volume discounts on all applicable orders [LEARN MORE]](https://cdn.kitchencabinetkings.com/blog/wp-content/uploads/contractor-discount-program.webp)
![Explore our photo gallery [GET INSPIRED]](https://cdn.kitchencabinetkings.com/blog/wp-content/uploads/explore-our-photo-gallery.webp)
![What everyone is saying about KCK [READ REVIEWS]](https://cdn.kitchencabinetkings.com/blog/wp-content/uploads/what-everyone-is-saying-about-kck.webp)
![Get a cabinet sample [SHOP SAMPLES]](https://cdn.kitchencabinetkings.com/blog/wp-content/uploads/get-a-cabinet-sample.webp)
![Pay over time, on your terms with Affirm [LEARN MORE]](https://cdn.kitchencabinetkings.com/blog/wp-content/uploads/pay-over-time-on-your-terms-with-affirm.webp)